SolusVM Integration - Plugin Configuration
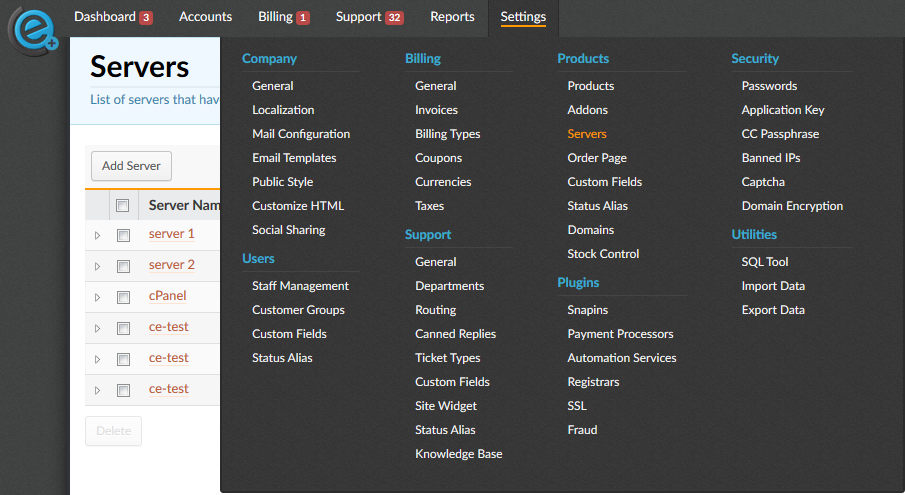
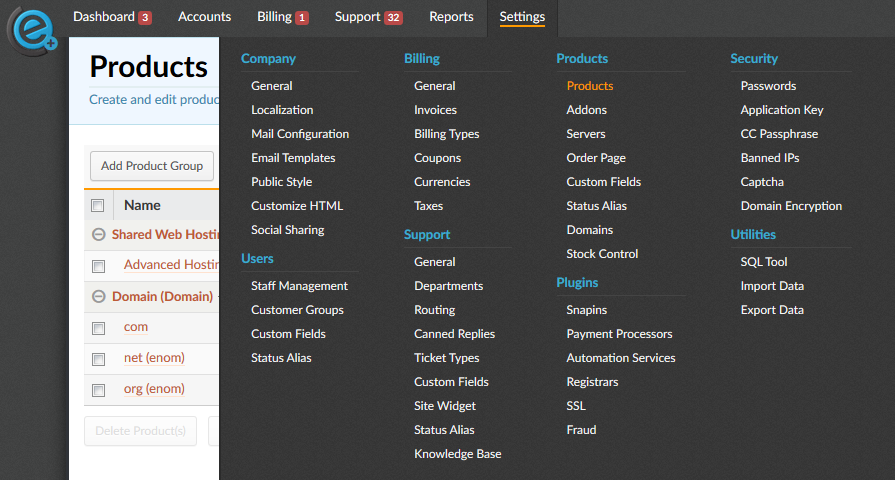
First, you need to configure the plugin in Clientexec's server section as shown in the picture below. Go to Settings > Products > Servers
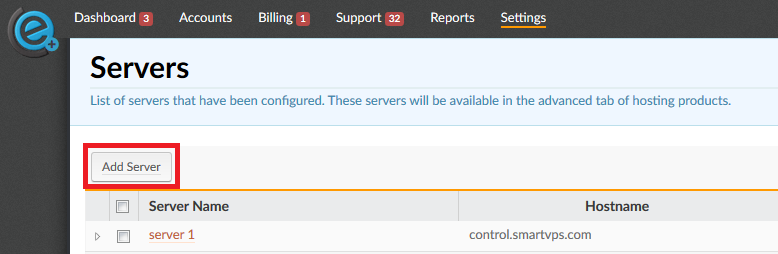
Now you need to add your SolusVM server by clicking Add Server.
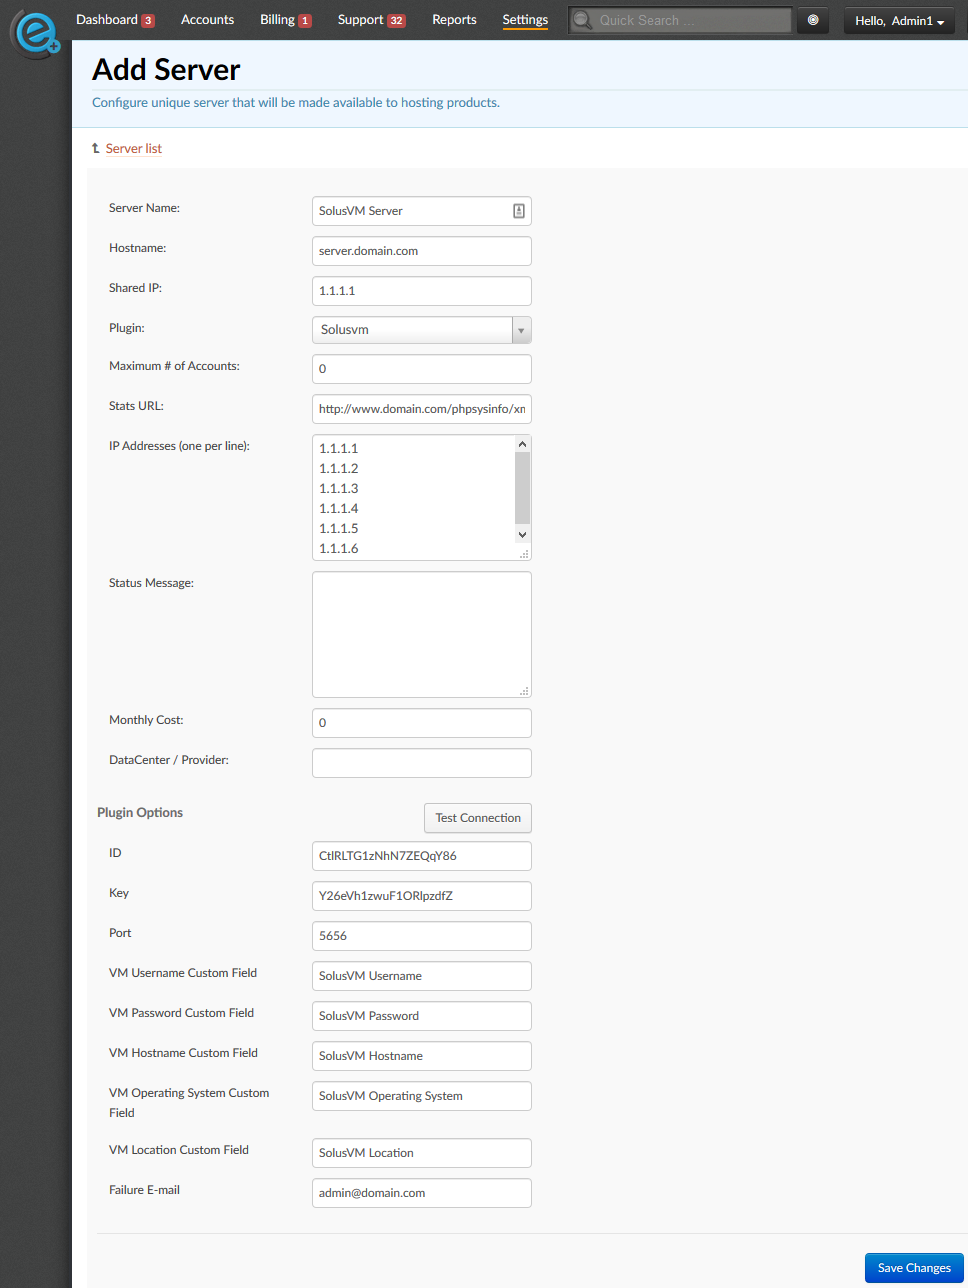
Server Name: Friendly name. How you will see it inside Clientexec.
Hostname: The name of the server where SolusVM resides.
Shared IP: Main Server IP
Plugin: SolusVM
Maximum # of Accounts: Set this to 0
Stats URL: Not Mandatory.
IP Addresses (one per line): If for some reason you need to manually assign an IP to someone, you would add it here. The IP's are automatically assigned when created through Clientexec.
Plugin Options:
ID: This will be found in SolusVM via Configuration > API Access > ADD API USER
Key: This will be found in SolusVM via Configuration > API Access > ADD API USER
Port: The port to connect with SolusVM API.
VM Username Custom Field: The name of the package custom field you will create that will hold the SolusVM Username. Note: This field should not be included in sign up.
VM Password Custom Field: The name of the package custom field you will create that your client will fill out during checkout.
VM Hostname Custom Field: The name of the package custom field you will create that your client will fill out during checkout.
VM Operating System Custom Field: The name of the package custom field you will create that your client will select during checkout. *Note: Please read below for more details about how to configure this package custom field.
VM Location Custom Field: Enter the name of the package custom field that will hold the Location (Node Group ID) for SolusVM. This is an optional setting only used if you have multiple locations/nodes
Failure E-mail: Anytime there is an error received from SolusVM, it will be sent to this email.
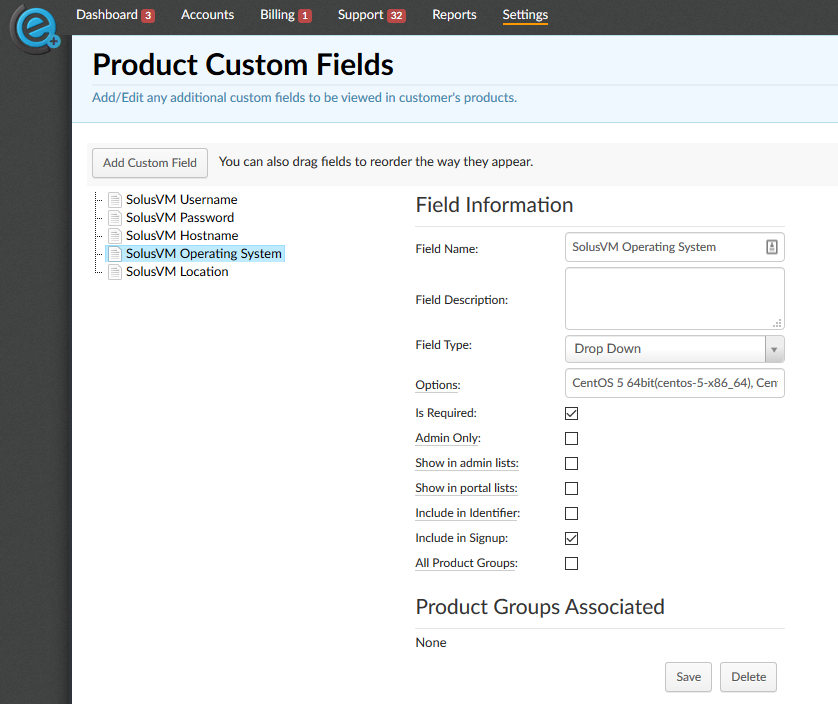
The custom fields will be created via Settings > Products > Custom Fields

*You will need to link a friendly name with the Operating System file name (minus the extension) located inside your SolusVM.
Example, if you have an Operating System called CentOS 5 32bit and the file name is centos-5-x86.tar.gz, you need to label it as such in the custom field, CentOS 5 64bit(centos-5-x86)
Remember to not include the file extension, if you want to include multiple operating systems you can use a comma (,) to separate them, like so: CentOS 5 64bit(centos-5-x86_64), CentOS 5 32bit(centos-5-x86)
In your Clientexec admin area, go to Settings > Products > Products
This example will be assuming you have setup your packages already.
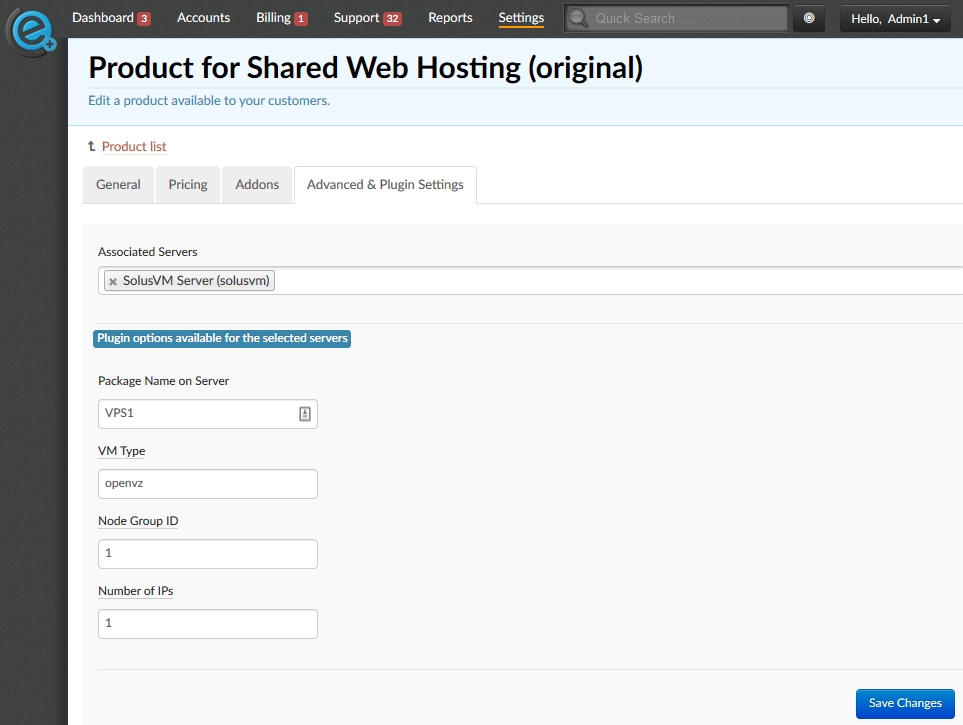
Click on the Advanced & Plugin Settings tab.
Associated Servers: Choose the friendly name you assigned to the SolusVM server from the down box.
Package Name on Server: You need to enter it
VM Type: This will also be listed in Plans > List Plans underneath the selected tab, (OpenVZ, XenPV, XenHVM, KVM< DNS)
Node Group ID: This will be listed under Nodes > Node Groups. The ID is in the far left column.
Number of IPs: How many IPs you want to assign upon creation of the container.
If you wish to have the package created automatically after the Order Processor service has been run, go back to the General tab and check the Automatically Activate Package? checkbox.
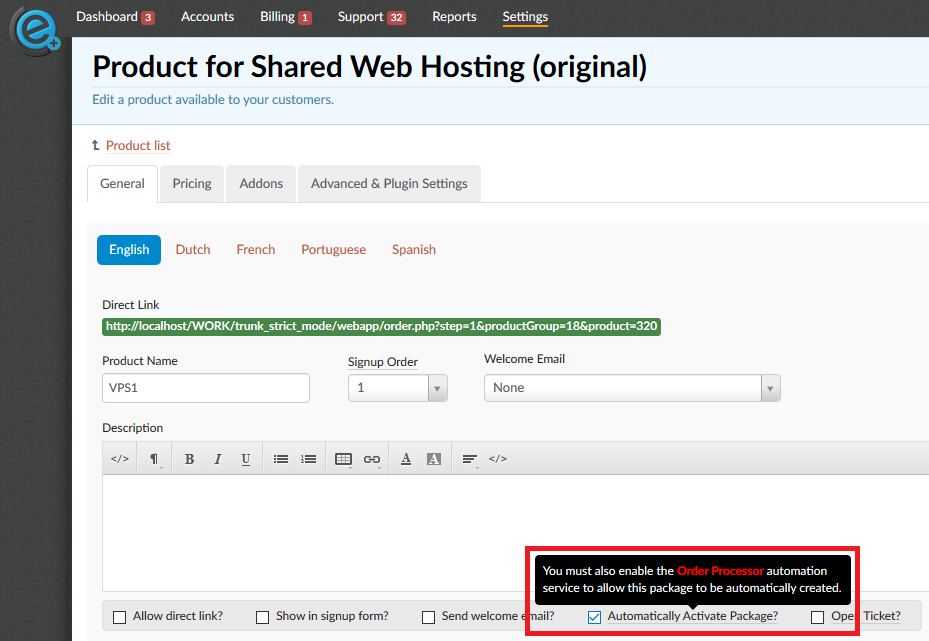
Note: For more information about the Order Processor service and other services available please visit Settings > Plugins > Automation Services
Please keep in mind you will need to repeat this process for each package that will be using the SolusVM server.


